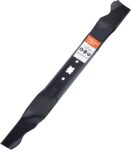
How to Change a Lawn Mower Blade
Unlocking Your Lawn’s Potential
In this guide on how to change a lawn mower blade, we’ll walk you through the simple steps to replace a dull blade, keeping your lawn sharp, clean, and healthy.
Gather Your Tools and Supplies
Mastering Lawn Care: Easy Steps to Remove and Replace Your Mower Blades
Preparing Our Mower for a Blade Change
Safety First: Is Our Mower Ready to be Serviced?Turn off the mower and allow it to cool down completely. This is crucial for our safety; working on a hot engine can lead to burns.
Park our mower on a flat surface. This prevents it from tipping over and ensures we have stable footing while working.
Disconnect the spark plug to eliminate the risk of accidental starts. We do this by locating the spark plug wire and gently pulling it off. It’s a simple yet vital step in protecting ourselves.
For example, imagine reaching for a tool, only to hear the engine roar to life unexpectedly. By following these steps, we’re prioritizing safety while preparing for a successful blade change!
Gathering the Right Tools
Arm Yourself: What Tools Do We Really Need?Equip ourselves for the task ahead! We’ll need the right tools to ensure a smooth blade change.
Start with a socket wrench: This will allow us to easily loosen the bolts securing the old blade. If you have a blade removal tool, grab it too; it can provide extra leverage and make the process simpler.
Next, put on safety gloves: Protecting our hands is essential. A sharp lawn mower blade can cause injuries if not handled properly.
Lastly, gather a work surface: Whether it’s a tarp or a sturdy bench, having space to lay out the blade and tools will keep us organized.
By taking these steps, we’re setting ourselves up for a successful and safe blade change!
Removing the Old Blade
Goodbye, Dullness! How Do We Get that Blade Off?Secure the mower to ensure it won’t move. We can use a block of wood to brace the blade or secure the wheels with wheel chocks; this provides stability as we work.
Loosen the bolt that holds the blade in place using our socket wrench. Remember to hold the blade steady with one hand to prevent it from spinning as we turn the wrench. We can leverage our body weight for added strength if needed.
Remove the bolt completely, and then take off the blade. If it feels stuck, gently tap it with a rubber mallet to dislodge it. Always handle the blade carefully to avoid cuts.
For instance, imagine we’re wrestling with a stubborn lid. The same concept applies here: with the right technique and a little persistence, we can free that blade with ease! Now we’re ready to move on to the next step.
Preparing the New Blade for Installation
Sharp and Ready: Is Our New Blade Up to the Task?Inspect the new blade carefully. Look for any defects such as dents, nicks, or warps that could affect performance. A well-maintained blade is critical for a healthy lawn.
Clean the spindle where the blade attaches. Wipe it down with a rag to remove dirt or debris. A clean spindle ensures that the new blade fits snugly and rotates smoothly.
Position the new blade correctly. The sharp edge should face forward, cutting through grass effectively as we mow. To visualize, think of how a knife slices through food; the angle matters!
By following these steps, we prepare our new blade for a successful installation, setting the stage for a sharper mowing experience.
Installing the New Blade
A Perfect Fit: How Do We Secure the New Blade?Slide the new blade onto the spindle. Ensure it fits snugly and aligns properly. The sharp edge should face forward, ready to slice through our grass with precision.
Insert the bolt that secures the blade, making sure it goes through any washers if applicable. This is the moment we ensure everything stays in place during our mowing sessions.
Tighten the bolt securely using our socket wrench. We want to apply enough force to make sure the blade won’t loosen during use, but avoid over-tightening, which could damage the spindle.
Check for proper alignment. Spin the blade by hand to ensure it moves smoothly. If it catches or feels uneven, we may need to readjust it. By following these steps, we can confidently enjoy our newly installed blade!
Final Checks and Maintenance Tips
Mower Magic: Are We Ready to Mow Like Pros?Reconnect the spark plug. This step is crucial—we want to ensure our mower starts efficiently is ready for action. Be sure the wire is securely attached.
Inspect for unusual movement. Slowly turn the blade by hand to check for any wobbling or resistance. If we notice anything off, double-check our installation to ensure everything is aligned correctly.
Test the mower. Start the engine and let it run for a few minutes. Listen for unusual sounds that might indicate a problem. If all is well, we’re ready to tackle our lawn!
Regular maintenance tips:
By implementing these practices, we keep our mower running smoothly for seasons to come!
Enjoy a Sharper, Healthier Lawn!
By changing our lawn mower blade, we ensure our grass receives a clean cut! Let’s tackle our next mowing task with confidence. Give it a try, and share your results with us!





There’s no way I’m doing this alone. I’ll hire someone next time! Changing the blade was more challenging than I thought. 😅 Thanks for the guide though!
Exactly! I feel you on that one. It’s tough sometimes!
No worries, Dave! It’s always better to ask for help when in doubt!
So, is it really necessary to change the blade every season? I thought the mower just needed maintenance, didn’t realize blades could wear down so much. 🤔
Great question, Bruce! Ideally, it’s good to check your blade each season and change if it’s dull or damaged.
Yeah, dull blades can tear the grass rather than cut it. Better for the lawn to keep it sharp!
Why didn’t I find this earlier?! I struggled with my blades last summer, and it was a pain. Thanks for finally clearing things up for me! 🙏
Happy to help, Chloe! Better late than never, right?
Right? Better late than never with lawn care!
I found the maintenance tips at the end super helpful! Always wondered if I was taking care of my mower properly. 😅 Now it feels more like a priority!
For sure! I never really thought about it until now.
That’s great to hear, Courtney! Proper maintenance really extends the life of your mower.
Blades are kinda scary! 😱 Just changed mine but I was definitely nervous about it. Love the way you broke it down. Might need to do it again in a few months!
You got this! It gets easier each time. Just remember to be safe!
Totally understandable, John! It’s normal to feel a bit nervous the first time.
The part about preparing the new blade was a lifesaver. I was so lost before! Just ordered a new blade based on your advice. Can’t wait to put it on!
Nice, Ricky! What blade did you end up getting?
Exciting! Make sure to follow those steps closely!
The final checks made me feel more confident about my new blade. I wasn’t sure if I was doing everything right but now I feel like a pro! Thanks for making this less scary! 💪
That’s awesome to hear, Megan! Keep up that confidence!
You got this! The more you do it, the easier it’ll become!
This guide was decent but I struggled a bit with removing the old blade. 😠 Anyone have tips for getting stubborn blades off? The bolt was so tight I thought I was gonna break my wrench!
Or try using a breaker bar. It’ll give you extra leverage!
Hi Tommy! Sometimes a little penetrating oil can help loosen stuck bolts.
LOL, I thought I could just use any tool to change the blade and wow was I wrong. My shopping trip for the right tools was quite the adventure. 😂 Thanks for the detailed list!
Sounds like you learned a valuable lesson! 😉 Glad you found the tools you needed.
What tools did you end up getting?
Just changed my mower blade for the first time using this guide! 🔧 It was super easy to follow, especially the tool list! I didn’t even realize I had most of the tools already. My lawn looks so much better now with the new blade. Thanks for the tips!
Awesome, Jessica! Glad to hear it was helpful! How does the mower run now?
Congrats on your first blade change! 🎉 Now that you know how, you’ll be a pro in no time!
Shoutout to whoever wrote this! Best lawn care advice I’ve ever found! 😄 Now I know what to do when the grass looks raggedy. Just changed my blade too and couldn’t be happier. Total game-changer!
Thank you, Debbie! We’re so glad you found it useful!
Game changer indeed! I can’t wait to try it myself!
Nice step-by-step! I just wish you had a video. Sometimes, seeing it is more helpful than reading. But I managed. I guess! 😬
Thanks for the feedback, Sam! We’ll consider adding video for next time!
Totally agree! Videos can really help those of us who are more visual learners.